

Limb tourniquet application represents an essential combat behaviour for all soldiers serving in the Australian Defence Force. To enable efficient and reproducible deployment of a combat tourniquet within high-pressure and high-consequence environments, a good working knowledge of the device is required. Proper tourniquet dressing conducted prior to tourniquet deployment will substantially improve your application speed and accuracy in what represents a no-fail activity.
The folding sequence described is easy to conduct and incorporates important features that facilitate single- and dual-handed tourniquet application using either a closed or open loop technique.
Step 1 – Secure the Secondary Retention into an open position
Description: Release the Secondary Retention tab and secure into an open position using the Velcro (Figure 1).
Rationale:
- Manipulation of the Secondary Retention represents a fine motor task that deteriorates under pressure.
- One less step is required during the tourniquet deployment sequence.
- Facilitates access to the tourniquet windlass and subsequent stowage after tightening.
- Important for single-handed tourniquet deployment, use in low light conditions, and when applying a tourniquet under night vision with impaired depth perception.
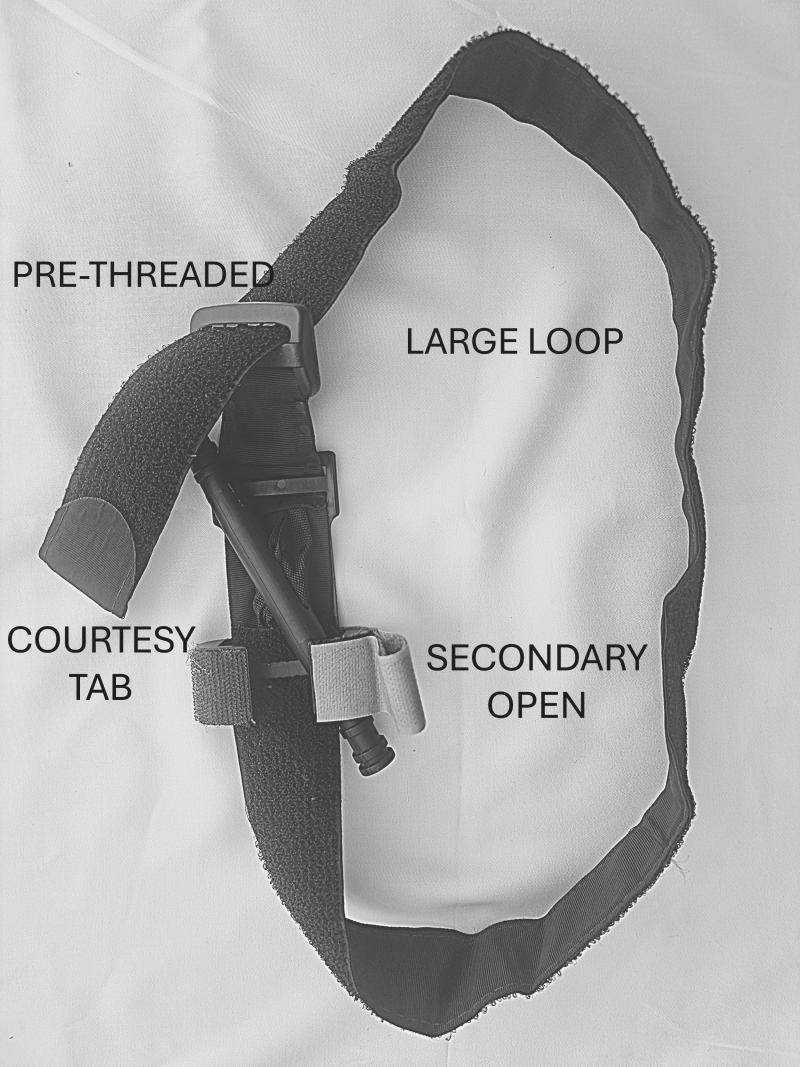
Figure 1: Initial configuration for dressing a CAT Gen 7 Tourniquet.
Step 2 – Pre-thread the tourniquet to create a closed loop
Description: Ensuring the strap is flat without twisting, pass the free edge of the tourniquet strap through the buckle. Keep the resulting loop of larger size, as opposed to pulling the excess strap through (Figure 1).
Rationale:
- Threading a CAT Gen7 tourniquet is a fine motor skill that deteriorates under pressure.
- Creates a closed loop for efficient single-handed use (self-application onto the upper limb).
- A large loop tourniquet is easier to deploy and is better suited to application onto larger limbs.
Step 3 – Fold a Courtesy Tab
Description: Fold the reinforced section of the free end of the tourniquet strap inwards to create a pull tab. Secure using Velcro (Figure 1).
Rationale:
- Assists with identification and manipulation of the end of the tourniquet strap during the initial sequence of application.
- Useful when applying a tourniquet wearing thick gloves or in low light conditions.
Step 4 – Create a Handle
Description: First, identify the Turn Point and Base Plate features located on the opposite side of the tourniquet to the windlass (Figure 2). The zone between these features represents the stowage zone for the tourniquet strap in Step 5. Pull the strap through the buckle so that the combined length of the Courtesy Tab and the strap is approximately 17cm. When folded back onto itself, the free edge of the Courtesy Tab should be level with the tourniquet Base Plate. Apply pressure to the Velcro hook and loop to secure the Handle.
Rationale:
- Prevents inadvertent dissociation of the closed loop during initial tourniquet deployment.
- After lifting the Courtesy Tab, the Handle represents a fist-sized grip point for removing the excess strap and conducting firm initial tightening prior to windlass application.
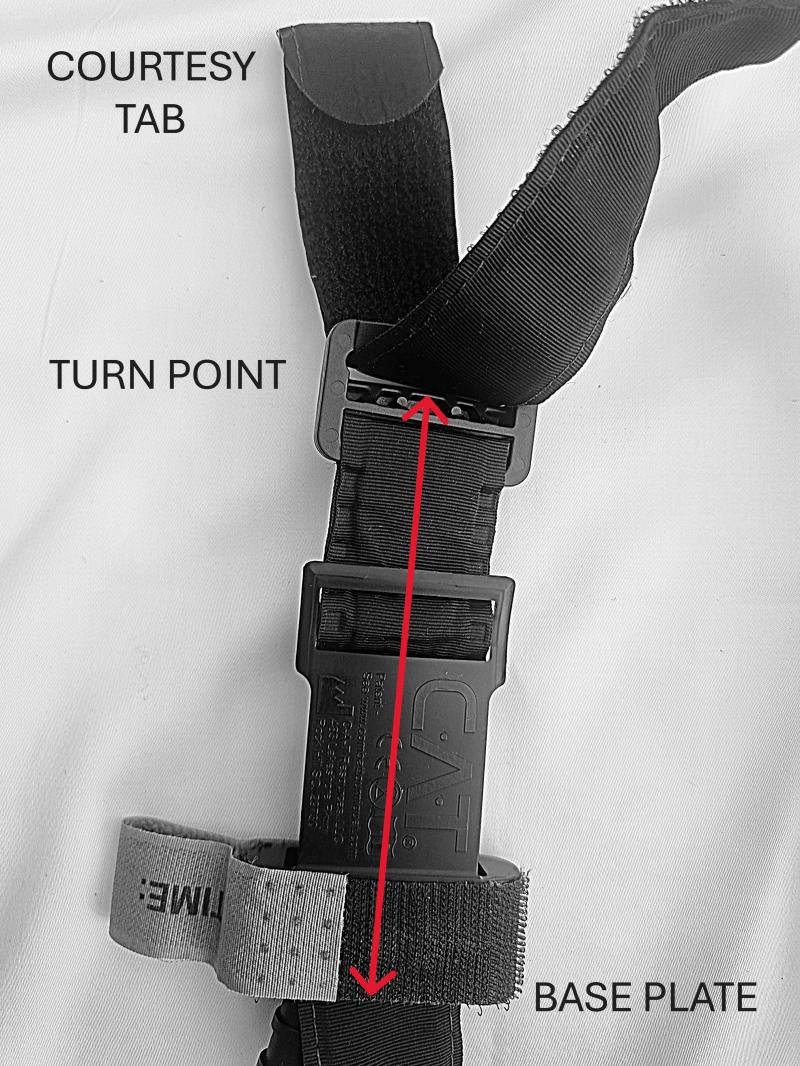
Figure 2: Identification of the Turn Point and Base Plate features. The stowage zone is indicated by the red arrow.
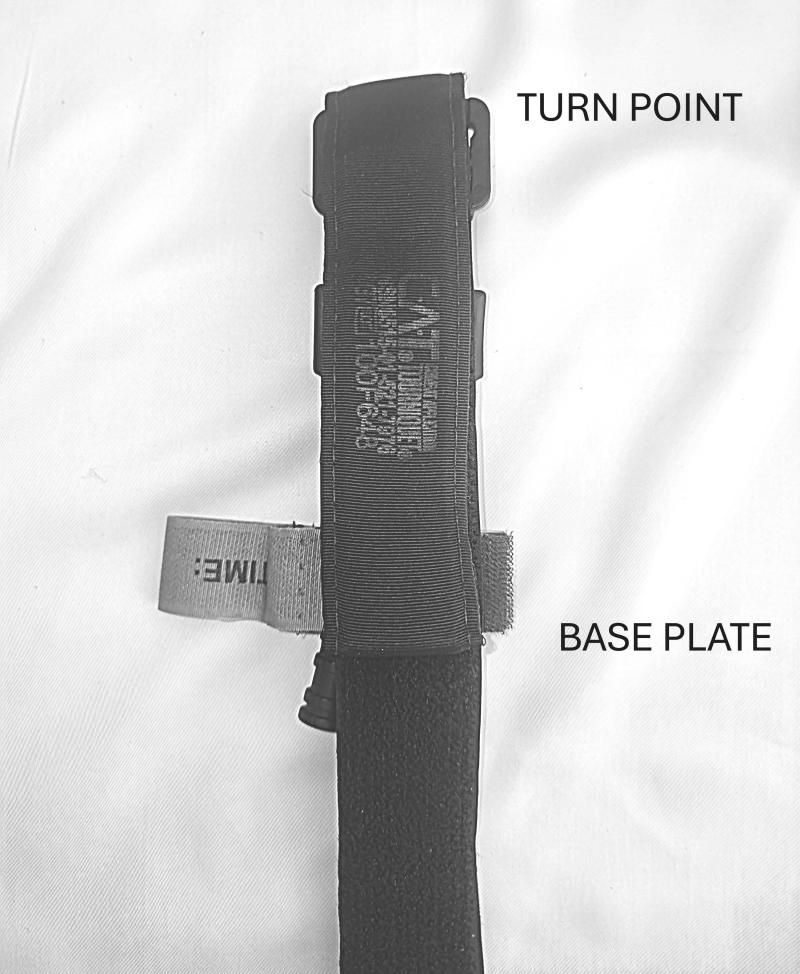
Figure 3: Creating the Handle. Free edge of the Courtesy Tab is level with the Base Plate.
Step 5 – Inward concertina and stow excess strap
Description: Open the remaining loop and concertina the excess strap inwards from the base plate to the turn point. After stowing 3 lengths, the Handle will fold down onto the assembly. Apply pressure to the Velcro hook and loop. The assembly will hold and retain form. Tourniquet folding is now complete.
Rationale:
- Efficient stowage of excess tourniquet strap.
- Velcro will assist the construct to hold form without the use of rubber bands and not inhibit deployment of the tourniquet.
- Holding form will facilitate efficient packing and enables the tourniquet to be thrown to a casualty during Care Under Fire.
If you’re interested in learning more, read: 10 Ways to Improve your Application of Combat Tourniquets