Part A | The Technique
Programming for push-ups is a complex task and not a one size fits all approach. By utilising the lessons delivered; individuals should look to build off and customise their own program to meet their individual needs, for most optimal results.
History of the Push-Up
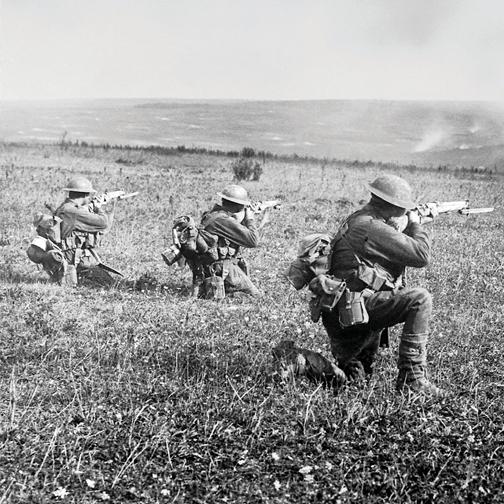
The push-ups has been used by soldiers for thousands of years, with records dating back as far as Roman times where they were used to prepare for the rigors of combat.
Australian Army context
For the Australian Army the push-up is a simple and effective tool to assess and train upper body strength within soldiers. It is readily used due to the simplistic nature in which it can be conducted with zero need for equipment and a limited impost to space. Direct reference to protocols can be found in Army Standing Instruction Part 8, Chap 4, Enclosure 2 to Appendix 3. The ability to conduct push-ups and quality of repetitions is also direct indicator of injury in trainees.
Push-Up Technique
The conduct of a push-up is a complex movement broken into 4 main areas. This article is written in a way to be gender neutral; however, implementations and positions are affected by biomechanical differences with both hip width, lever length and chest size contributing to each person needing to develop separate cues and drills applicable to them. While this will undoubtedly cause friction with some, the technique taught is designed to be not only best practice IOT develop repetition and ability to generate power but also reduce injury and load on the body. The intent is for optimisation of position to increase longevity throughout not only one’s military career, but life.
Arrow and the T – There are numerous ways in which people attempt to conduct a push-up, with all having some benefits, but with most having equally more detractions. I first want to draw your attention to the floor press to provide grounding as to why the T does not work. By picking up the bar in this position there is limited to no stability, range, or ability to move the arms if at all possible. You are also likely to find stress on your back muscles, something that should not be happening in a push-up. We then move our arms so that they resemble an arrow, 45 degrees at minimum, you can now see that we have the ability to move through the full range of movement.
To further exemplify why the arrow is import, partner up with someone and try the following drill. With your arms in the T position try and push them over. This will be near on impossible. Now come back into the arrow and try the same. You should now see that through lever length, and with stability through your shoulder you now have the ability to force generate power. Now knowing this it should dissect for you a number of potential flaws as to why you may have adopted this position. The change to the arrow will likely coincide with a need to improve triceps strength (see Part B).
Head and eyes – In order to keep your neck in a neutral position your head and eyes should be looking approximately 30 cm ahead of you at all times. An easy guide for novices and for training is to lie down flat on the ground and extend your arm out straight, the approximate position should be in line with where the wrist reaches. Placing a marker, potentially your watch, in this position should provide a focal point to maintain throughout.
Hands – Now that both the arrow position is achieved in order to do so hands should be sitting comfortably just under the shoulders, as recommended in ASI. Hands should be externally rotated 15 degrees, much similar to the cue used in the deadlift ‘break the bar’ this will help take the strain off your shoulders and provide a stable platform in which you can conduct repetitions.
Feet – Within the testing conditions in Army feet are to be no more than 30cm apart. The augmentation of this is to give a generalised distance in which all can work to. For best results soldiers should work at no further than hip width apart, as outside of this is countering for potential deficiencies in other areas. The best way to work out which position is best for you is to start with feet together and complete a couple of repetitions and slowly move apart until hip width is reached, this will alter your centre of gravity slightly and should be evident by the strain on your hip and glute region. Moving outside of hip width, hips are thrown out of alignment placing excessive stresses on the body.
Depth – Is also a relevant area and covered as a weakness in Part B. With implementation of ‘best practice technique’ this should be the focus of development and not the cause of a technical flaw.
Where to next?
For some members they may be feeling that they have gone backwards and for others potentially now not even having the ability to conduct even a single repetition. I want to reassure you that this is normal and not a bad thing. By making the changes at the earliest point in your career you will set yourself up for success as you progress, reduce injury and increase physical performance potential. With other highly flawed techniques the longevity is compromised and so is the translations to other forms of training and activity.
At this point I want to reassure those of you who feel like progress is slow initially to think of progress as a ratio and percentages. A member only doing two push-ups with strong form going up to 4 reps is a 100% improvement and that 2 rep increase are the equivalent of someone doing 25 reps going up to 50.
The next step is to work through Part B and isolating individual deficiencies and biomechanical restrictions, for specific training implementation for improvement.
Part B | Common Weaknesses
The myth that that the best way to get better at push-ups is to do more has been circling through the ADF and fitness industry for a long time. However, if there are weakness or deficiencies identified simply conducting more push-ups will not rectify this and only lead to more poor form or work arounds built into the technique to overcome.
Glute Strength / Activation – One common misconception is that the push-up is simply an upper body activity. Whilst there is an element of truth, a common failure point for many is actual weak or poor glute activation. A simple drill to test glute activation is a single-leg box squat. Ideally you should be able to complete a set of 10 per leg without any issues. If not it is recommended that the activities from Group 1 are incorporated into your daily training. There are options here that can be done in the office environment or as part of your warmup and own training prep.
Abs – Abdominal related deficiencies will generally stem from one of the other areas of weakness; however, an area that most of the population suffer from, including military personnel, particularly in the office based environment. With most abdominal training and activities we work in a constant state of adduction ‘moving towards our midline’. What we do not practice enough and can be evident in push-ups, is the lack or abduction ‘opening up of our body’. To counter this there is a select number of drills that will both improve posture and strength but also inherently improve push-up technique. Working through Group 2 these can easily be incorporated into both preparation and post workout to improve performance across a number of related fields.
Depth – This is one of the easiest activities to cue for both males and females, once technique is sound, ‘working within the arrow.’ By the usage of a cone, conduct you repetitions by placing your cone in a position underneath your chest which allows you to just brush the top in the lowered position. This positioning of the cone will differ from each person and will require assistance of a partner and potential videoing.
Chest – For the most part this is not actually an area of concern and reflective of a greater technical issue. See ‘Arrow and the T.’ For those members with larger chests it is advisable to consider changing training methodology to decline bench, which will bring into play more triceps and help work within your own biomechanics.
Triceps – Up to 66% of load is placed on the triceps throughout each completed repetition as such it is imperative these muscles are specifically trained and targeted for development. Group 3 provides a variety of activities that can be included into your own training schedules, as well as alternatives with greater transferability to the military specific movement. A gauge of tricep strength and stability is by the use of parallel bars to conduct a bodyweight dip. Goal here is to be able to complete at least 5 of these unassisted. If not, assisted dips incorporated into training provide a starting point for development.
Group 1 | Glute Drills
- Single-leg Box Squat 3 sets x 10reps (3 times a week)
- Single-leg glute bridge 3 sets x 10reps (3 times a week)
- Crab walk 3 x 12 per direction (2 times a week)
- Hydrants 3 x 10 (2 times a week)
Group 2 | Ab Drills
- Bird Dogs 3 x 10 (2 times a week)
- Dead Bugs 3 x 10 (2 times a week)
Group 3 | Tricep Drills / Training
- Decline Bench 4 x 8 or as a substitute for Floor Press / Bench
- Parallel Dips (Assisted) 4 x 8
- Hammer Curls 4 x 8
- Upright Row 4 x 8
- Tricep Extension 4 x 8
Group 4 | Push-Up Specific
As a standalone to improve your push-ups there several activities that can be done to improve your form. I want to implore you not to be sold on technique variations, such as altered hand positions, (back to the T and diamond position are common examples of what not to do) and feet (moving wider than hip width) if it changes the way you conduct the move outside of what is discussed in Part A.
Changing the angle such as onto an incline/decline are a great tool, along with time under tension, and speed of movement, so long as form never becomes compromised for more reps. The following drills are but an extract of ideas and not limited to imagination, so long as form always comes first.
- 2 min Drill = Set up cones 20m apart. Start on the first cone (can be used as a depth gauge if required) complete as many reps as possible before fatigue (no rest position) as soon as fatigue is reached walk to the next cone and continue with reps. Repeat for the entire 2 minutes.
- Overload Day = Rather than conducting large number of reps and sets dedicating an entire day to training to reach a target once a week. A good reference is to work at a number 4-5 times that your goal cumulative throughout the day. Example goal of 40 would conduct 200 reps broken down into small sets built around other training and day to day.
- EMOM (Every Minute on the Minute) working at smaller sets over a short period of time. Example maybe 10 sets of 10 push-ups.
- Time under tension such as lower for 5 sec raise for 5 sec.
- Hand Release push-ups.
Never substitute technique of your push-up to conduct any activity only regression of difficulty.
